

STEP 2 - Create a new tab for "crossbreeding" and named it "Crossbreed".

STEP 3 - Select wanted animal parts using "Lasso Tool". Then I pasted them on the "Crossbreed" tab.


STEP 4 - Select the colour with the best contrast in "Channels" for further cropping. Here, Red has the best contrast.

STEP 5 - Duplicate the Red Channel and I named it "Red Cropping". I disable the visibility on other channels after this.


STEP 6 - By using "Lasso Tool" to select certain areas and using "Levels" and "Brush Tool" on the other hand to differentiate the colours black and white.


STEP 7 - After this, I invert the picture. Then I click on the "Red Croppping" channel while holding down the "Ctrl" button which is to select the white area.


STEP 8 - Enable the visibility on other channels but disable the "Red Cropping" channel's visibility. Merge the chameleon and rooster layers and I added a new layer and named it "Plain".


STEP 9 - Go to "Select" and choose "Load Selection". Select "Red Cropping" and click OK. Then, I pressed Ctrl+J to copy the selected areas on a new layer and disable the visibility on the previous layer.


STEP 10 - Using "Lasso Tool" again, I selected the rooster's head and pasted it on a new layer so I can name the layers "Chameleon" and "Rooster".


STEP 11 - I mirrored the rooster's head and added a "Layer Mask" to crop the eye from the rooster and I applied it when finished. Then I dragged it to the chameleon's head and adjusted it until it matches. I also used "Clone Stamp Tool" to touch up.


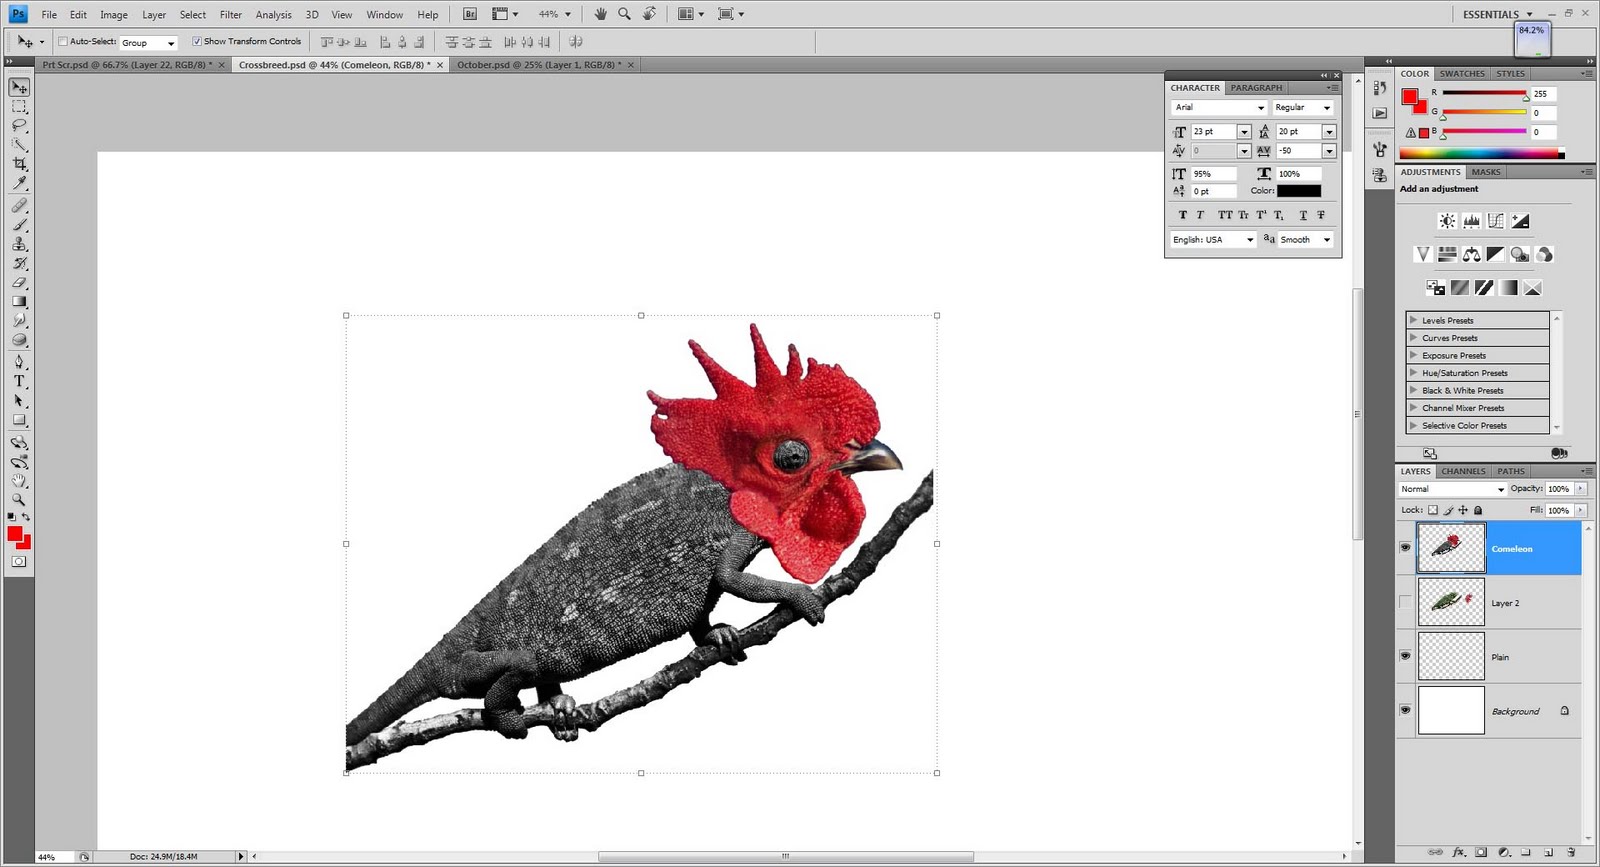
STEP 12 - I made the chameleon's body Black and White by using the "Hue/Saturation" option. After this I merged the "Chameleon" and "Rooster" layers and named it "Comeleon"(Co for cock).

STEP 13 - I open a new tab named "October" which was previously done similar to the "September" templates and pasted the "Comeleon" and did some adjustments.

The End...
No comments:
Post a Comment