Showing posts with label TANWENYONG. Show all posts
Wednesday, January 12, 2011
Tuesday, January 11, 2011
WEN YONG -WORK PART 5 (TEMPLATE DESIGN CORRECTION)
[PEACOCK + ELEPHANT] BY WENYONG.
This the the Template after Correction.
Step 1. Drag an Elephant image to the Template Design. Place it nicely with Free Transform Tool. Erase the part that not needed by using Eraser Tool.
Step 2, Drag in another Peacock image. By using Free Transform Tool, place it nicely, synchronize with the Elephant Layer below. Erase the part that not needed by using Eraser Tool.
Step 3, Tone down the Elephant Layer by adjusting the Hue and Saturation. Here we down.
Tuesday, January 4, 2011
WEN YONG -WORK PART 4 (TEMPLATE DESIGN)
I started to do our template design lead by our leader - Zo Phoon.
Step 1, Open a NEW DOCUMENT [A4 in Vertical]
then apply Blending Option. [Gradient Overlay]
Step 2, Adjusting the Color with Hue and Saturation.
Step 3, Drag the image created before this, arrange it by using Free Transform Tool.
Step 4, Add in Text. [Month Title and Year]
Step 5, Create some Shapes with Rectangle Tool. Arrange it with Free Transform.
Step 6, Create another White Shape below with lower Opacity. [11%]
Step 7, Add in the Dates by using Text Tool. Arrange it nicely and apply color to highlight the [Sunday].
Step 8, Lastly, add in Label that stated who are the designer. Done!
WEN YONG -WORK PART 3 (FROG+SQUIRREL)
Step 1, Open a Squirrel Image saved from Flickr.com then, Crop it out by using Crop Tool.
Step 2, Drag in a Frog Image, rename the layer, arrange it by using Free Transform Tool, remove the part that not needed by Eraser Tool.
Step 3, Duplicate the Frog Layer, then use the Layer Blending Option - Luminosity.
This shows the Squirrel's fur under the color of the Frog Image.
Step 4, Repeat Step 3 to get more details. (Blending Option - Luminosity.)
Step 5, Adjust the Hue and Saturation of the image to make the First Layer (Squirrel Layer) becomes Black and White as we needed to add in our template design later.
Step 6, Crop the Squirrel+Frog Crossbreed Animal Image by using Eraser Tool to remove the unwanted parts. This allow me to add it in the template easier.
Thursday, November 4, 2010
WEN YONG -WORK PART 2 (Peacock+Elephant)
Step 1, open a peacock image.
Step 2, open a elephant image.
Step 3, Arrange them by using Free Transform (Ctrl+T)
Step 4, Zoom in for more details.
Step 5, Combine the 2 edge by using Clone Stamp Tool.
Step 6, This is what happen after using the Clone Stamp Tool.
Step 7, Repeat the same step to merge all the edges. And here we done.
Thursday, October 21, 2010
THIRD MEETING.
Wednesday, October 20, 2010
Primary Idea. WEN YONG -WORK PART 1 (Elephant+Leopard)
After having our first meeting today, our group, TwoPointSix came out a primary idea of our calender design.
Animal Crossbreed.
Thats our primary idea!
This is our maiden try-out by using Adobe Photoshop CS5.We are going to combine an elephant with leopard skin and this is the final product.

First and most important is to find the proper source images. I chose these 2 because it is fun and interesting. Since I liked the high contrast color of the leopard, I decided to use the actual fur and "mold" it over the elephant's body.
So with that said, I extracted the leopard and pasted it into the elephant file on a new layer.
NOTE: It's a good idea to use a hi-r es image because when you're stretching pixels, a low resolution file is going to lose its realism.

Step 1, create a new horizontal A4 file.

Step 2, paste the elephant file, then the leopard skin in a new layer.Then, lower the opacity of leopard skin and compare it to the elephant's background.

Step 3, erase the unwanted part by using the Eraser Tool (E).
_________________________________________________

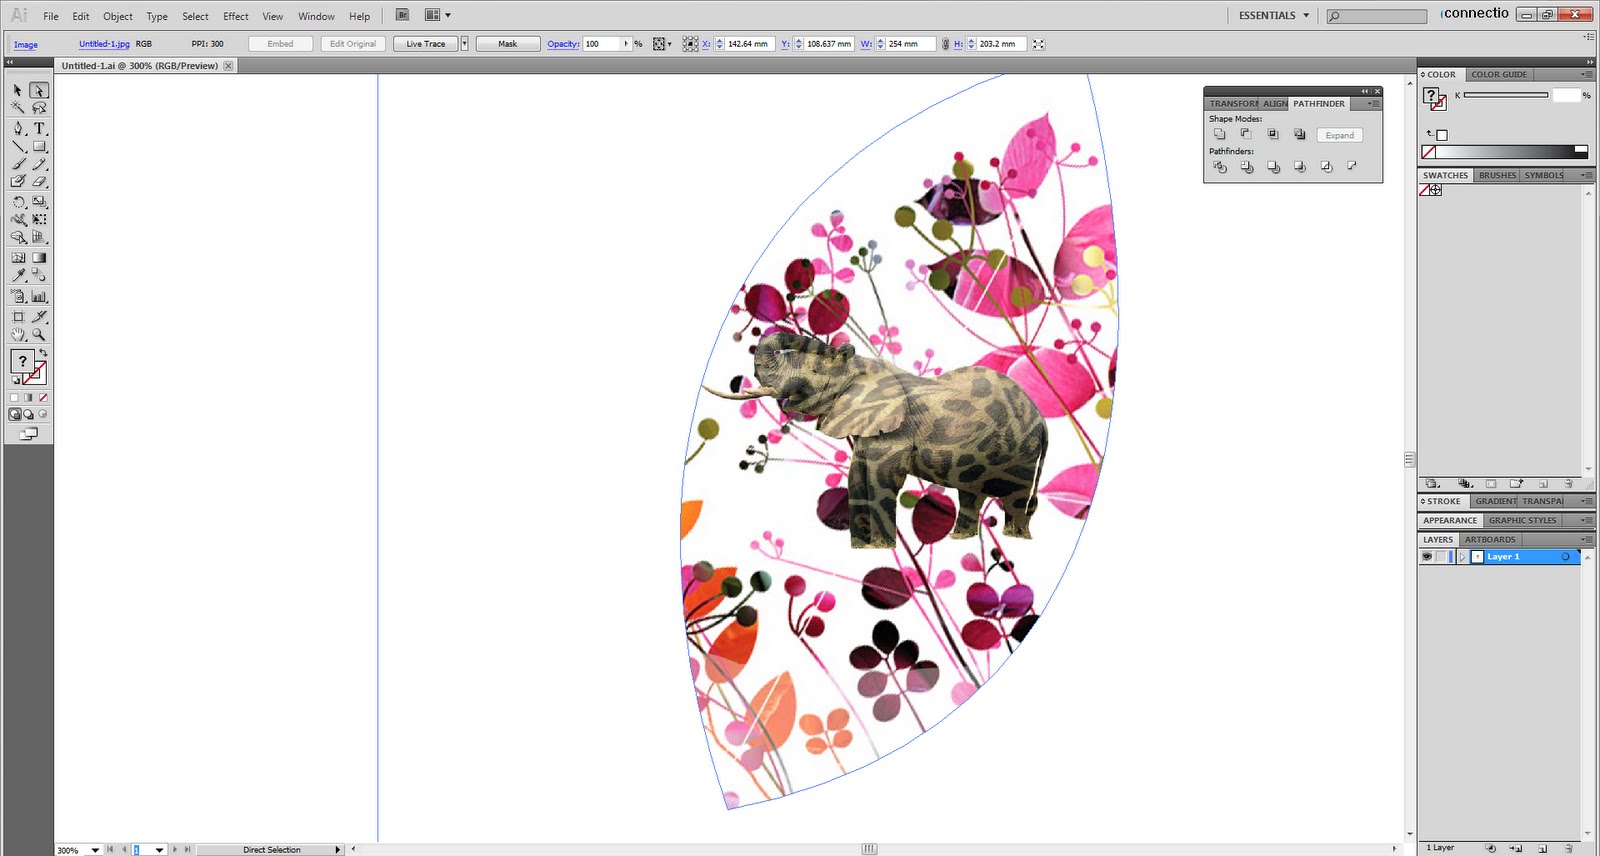
Then, I'll add a background by using Adobe Illustrator CS5.
Step 1, copy the elephant by using Quick Selection Tool ( W ) in Adobe Photoshop CS5. After that, paste it on a horizontal A4 file in Adobe Illustr ator CS5. Then add a flower picture as background.

Step 2, create a frame using Shape Tool and Pathfinder Tool.

Step 3, Crop it out using Crop Tool and transfer to Adobe Photoshop CS5.

Step 4, add another new layer for adjustment of brightness and contrast of the elephant to make it pinkish and blend with the background.

100% Done !

This is the comparison of the original elephant and the pinkish elephant.

Heres another design that I made.
BY: TANWENYONG http://freakyspacemonkey.blogspot.com/
Tuesday, October 19, 2010
Subscribe to:
Posts (Atom)