Sunday, November 7, 2010

Samuel, part 1.

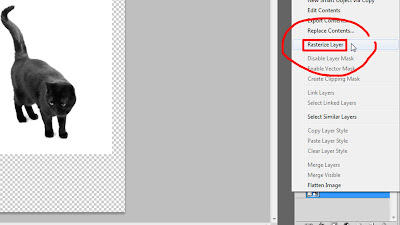
*you must rasterize your layer if there is a cross on ur layer. This is to make your layer editable.

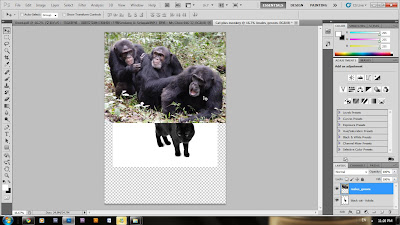
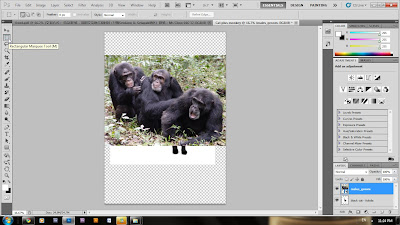
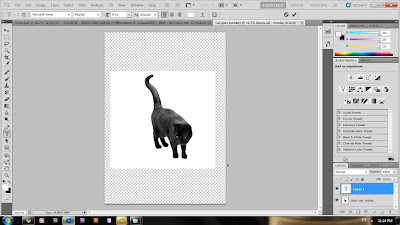
*use rectangular marquee tool to mark the part that you want. Then, Ctrl + X > Ctrl + V to cut and paste it...

*select the layer of the other two monkeys, and delete it.

To be Continue!


ZO-WORK PART 2

STEP 1 --- Click IMAGE, then select CANVAS SIZE. A box pop out. I change both the width and height to 1000 pixels. This act will give you a larger space to work on.


STEP 2 --- Use PAINT BUCKET TOOL to drop red colour on the empty space.


STEP 3 --- Open the original cheetah and drag it to the new document window. Rename it to CHEETAH HAIR.


STEP 4 --- We can't see the hair details clearly after using ERASER. We can use following step to get more detail hair. Click FILTER, select EXTRACT. Select EDGES HIGHLIGHTER TOOLS and start dragging your mouse to highlight the outline of the cheetah. Next, select FILL TOOL or click G button, then click the empty space inside the outline to fill it up. Then, click OK. (I cant use print screen after I open the EXTRACT window, so I can only describe this step by words)

STEP 5 --- Open the bat picture and drag it to your document window.


STEP 6 --- Change the layer name to LEFT WING.


STEP 7 --- Click EDIT, select TRANSFORM and select FLIP HORIZONTAL.


STEP 8 --- USE ERASER TOOL to erase all part except the left wing. Click EDIT, then FREE TRANSFORM to adjust wing size.


STEP 10 --- Select part of the leopard skin, click EDIT, select COPY and click PASTE. Rename the layer as WING SKIN 1.


STEP 11 --- Move the WING SKIN 1 layer below the LEOPARD layer.


STEP 12 --- Click EDIT, select TRANSFROM, then selsct WARP to reshape the wing so it attach nicely to the wing and the leopard back.


TO BE CONTINUED...

Thursday, November 4, 2010

JASON WONG - WORK PART 1 (Giraffe + Tiger)

This what I did (picture above) for my 'tiger+giraffe' as I combine them...Below is how I did it:
 First, since my photoshop is already opened, I went toFile>New and edit the settings and clicked 'OK'. I then dragged the giraffe picture that I have saved in my computer after I downloaded it from the internet into the photoshop.
Next,  I renamed the layer 'giraffe-statue' to 'girraffe'. Then, I duplicate the layer to create layer 'girraffe copy'.
 After that, I dragged a picture of a tiger that I downloaded from the internet in the photoshop and selected 'place'.The new layer is called 'tiger-regal'
Then, I lower down the tiger's opacity so that it is easy for me to adjust the tiger's image. When I'm done, I 'razterise' the tiger layer and erased whats not needed on the layer.

Next, I turned my tiger layer from 'Normal' to 'Overlay' with the opacity setting that I set to 100%. I then erase the neck part, not all, because I would later use the mixer brush tool.
I then select the the layer 'girraffe-copy' and used the mixer brush tool to 'mix brush' from the neck part to its whole lower body.
 I then select the layer 'tiger-regal' and used the burn tool (shortkey: [ALT]+[left-click mouse]) to darken some parts of the giraffe+tiger and dodge tool (just-left click on an object) to lighten up some parts of it. I also lowered the opacity from 100% to 83%.
I then set the layer to 'Hard light' from 'Overlay' and lower its opercity to 60%. I also erased more a bit on the neck of the giraffe. By the way, the brownish-pink-looking color below the giraffe+tiger appears clearly afer i set the 'tiger-regal' layer to 'Hard light'.

I'm done!

WEN YONG -WORK PART 2 (Peacock+Elephant)

Step 1, open a peacock image.

Step 2, open a elephant image.

Step 3, Arrange them by using Free Transform (Ctrl+T)

Step 4, Zoom in for more details.

Step 5, Combine the 2 edge by using Clone Stamp Tool. 

Step 6, This is what happen after using the Clone Stamp Tool.

Step 7, Repeat the same step to merge all the edges. And here we done.

Wednesday, November 3, 2010

ZO-WORK PART 1

STEP 1 --- Open the leopard image which I saved from internet.


STEP 2 --- Double click the BACKGROUND layer and a NEW LAYER box pop-up. I changed the layer name to LEOPARD, then click OK.


STEP 3 --- Click CREATE A NEW LAYER button at the bottom of the layer panel box to create a new layer and name it LAYER 1.


STEP 4 --- Click the PAINT BUCKET TOOL button or press G, select red colour as the foreground colour, click the paper to drop color. I choose red colour because it is contrast to the image so I can see the image clearly after erased.


Now, I can see my layers like this.


STEP 5 --- Select ERASER tool or press E button, then start dragging the mouse to erase the part which is not needed. Zoom in image into very large size and set the diameter of the eraser into small size so I can get smooth image when I zoom out. Actually, I could use MAGIC WAND to cut, but I didn't. This is because I think its hard for us to control the magic wand. We will get rough edges after cutting. Eraser tools  take longer time but its worth because the edges are smoother.


My leopard image looks like this.

Save this file with new file name.

 
TO BE CONTINUED...