Wednesday, January 12, 2011

CONCEPT, SKETCHES, INTERFACES

The final concept is ANIMAL CROSSBREED. We want to show somethings which people may not see or think before. Its fresh for people to see something which doesn't really exist in the world. Putting two or more animal together would be a great chance for us to show our skill in using PHOTOSHOP. This is why we choose this concept.

HERE IS THE SKETCHES....


Below are the interfaces that we didnt choose.


IMPROVEMENT 2


This would be the last change to the template. We added the student id of the creator into the calender to let the lecturer know the creator of the page. We had made same changes to the other 12 month.

YEE KUANG HOOI WORK PART 4

[Bull Elk + Rabbit] BY YEE KUANG HOOI


This is the October Template.
First, Drag with Ctrl + Right Click and paste the crossbreed animal into the template.


After that, set its Saturation to -89.


Use Burn Tool to do some repair.


Lastly, Create a new Layer with Blending mode of Color.
use brush tool and choose the color i want to color on that layer.
Color the specific part of the Crossbreed animal.


And the October Calander is done.


YEE KUANG HOOI WORK PART 3 (TEMPLATE DESIGN)

[Penguin + Dog] BY YEE KUANG HOOI


This is the template.
After that, I drag the Crossbreed animal, Penguin + Dog into the template .psd
And resize it into a proper and suitable size.


After pasting, Change the Saturation into -89.


Use Burn tool to repair the animal.


After that, Create a new layer and change its blending mode to Multiply.
Use Brush tool and choose the color i would like to use and color the certain part of it.


After that, Merge the Crossbreed animal, Hue and Saturation and Layer with Blending mode of Multiply together.


And it is done for September.


YEE KUANG HOOI WORK PART 2

And now is another crossbreed animal.


Bull Elk is chosen this time.
I just need its head. So, firstly i Duplicate the background layer.
Hide the background layer, and let the duplicated layer visible.
Eraser tool is used to remove the unwanted part.


The Bull Elk's head is done, and now it is turn for another animal - Rabbit.


After open the rabbit.jpg,Duplicate it and then hide the background picture and let the duplicated picture visible. Alt + Click from the Bull Elk psd file and then move and paste the Bull Elk's head on the Rabbit jpg file.


Seem like the Bull Elk's head are way to small to join the rabbit's body.
So, I click Image> Canvas Size, and then Add extra 4 inch for the whole file.
After done that, there is extra part for me to resize the Bull Elk's Head.


And now, Ctrl + T on the Bull Elk's head and then resize it and join on the rabbit's body.


After that, use Eraser tool to remove the unwanted part on rabbit's layer.
After that, create Layer Mask on Bulk Elk layer.
Use Brush tool to repair the Bulk Elk and then change Brush Preset picker to soft Round. Draw around the joint part of Bull Elk and rabbit on Bulk Elk's layer to let it look more joining.

After done those, Click Image> Image Roatation > Flip canvas Horizontal to change the Crossbreed Animal's face direction.


And the second crossbreed animal is done.


YEE KUANG HOOI Re-works part 1

Since my previous work has been rejected, so i did again with another animal crossbreed.


The first animal I had chose is Penguin.
Duplicate the background layer with 2 same picture layer.
So, that later I can copy the duplicated penguin picture with transparent background after i use Eraser tool to erase the unwanted part.


After used the eraser tool to remove the unwanted part.
It will be like this.The penguin part is done.
After that is dog.


This is dog picture.
Same like penguin, duplicate the layer with same picture.
Hide the background picture.
Erase the unwanted part in the duplicated picture.


So, This is it.
After that open both animal psd file.


Alt + Right Click on the penguin picture to copy it and move it to the dog psd file.


Ctrl + Right click on penguin and then Ctrl + T to resize it and then join together with the dog's body.


After that, Ctrl + Right click to dog's body and use Eraser tool to remove the unwanted part on dog's body.
After that, Ctrl + Right click to Penguin and then click Add vector Mask for penguin.


After that, use Brush tool to remove the extra part of penguin.
Then,change the Brush preset picker in to soft round.
Draw the part that joint penguin body and dog's body let it be transparent and look more joining together.


After masking, Shift + Right click both layer together and then Ctrl + T to resize the Crossbreed Animal.

It is done for Animal Crossbreed work one.
.

OCTOBER By DENYI

STEP 1 - Start by looking for suitable animal pictures.


STEP 2 - Create a new tab for "crossbreeding" and named it "Crossbreed".


STEP 3 - Select wanted animal parts using "Lasso Tool". Then I pasted them on the "Crossbreed" tab.


STEP 4 - Select the colour with the best contrast in "Channels" for further cropping. Here, Red has the best contrast.


STEP 5 - Duplicate the Red Channel and I named it "Red Cropping". I disable the visibility on other channels after this.


STEP 6 - By using "Lasso Tool" to select certain areas and using "Levels" and "Brush Tool" on the other hand to differentiate the colours black and white.


STEP 7 - After this, I invert the picture. Then I click on the "Red Croppping" channel while holding down the "Ctrl" button which is to select the white area.


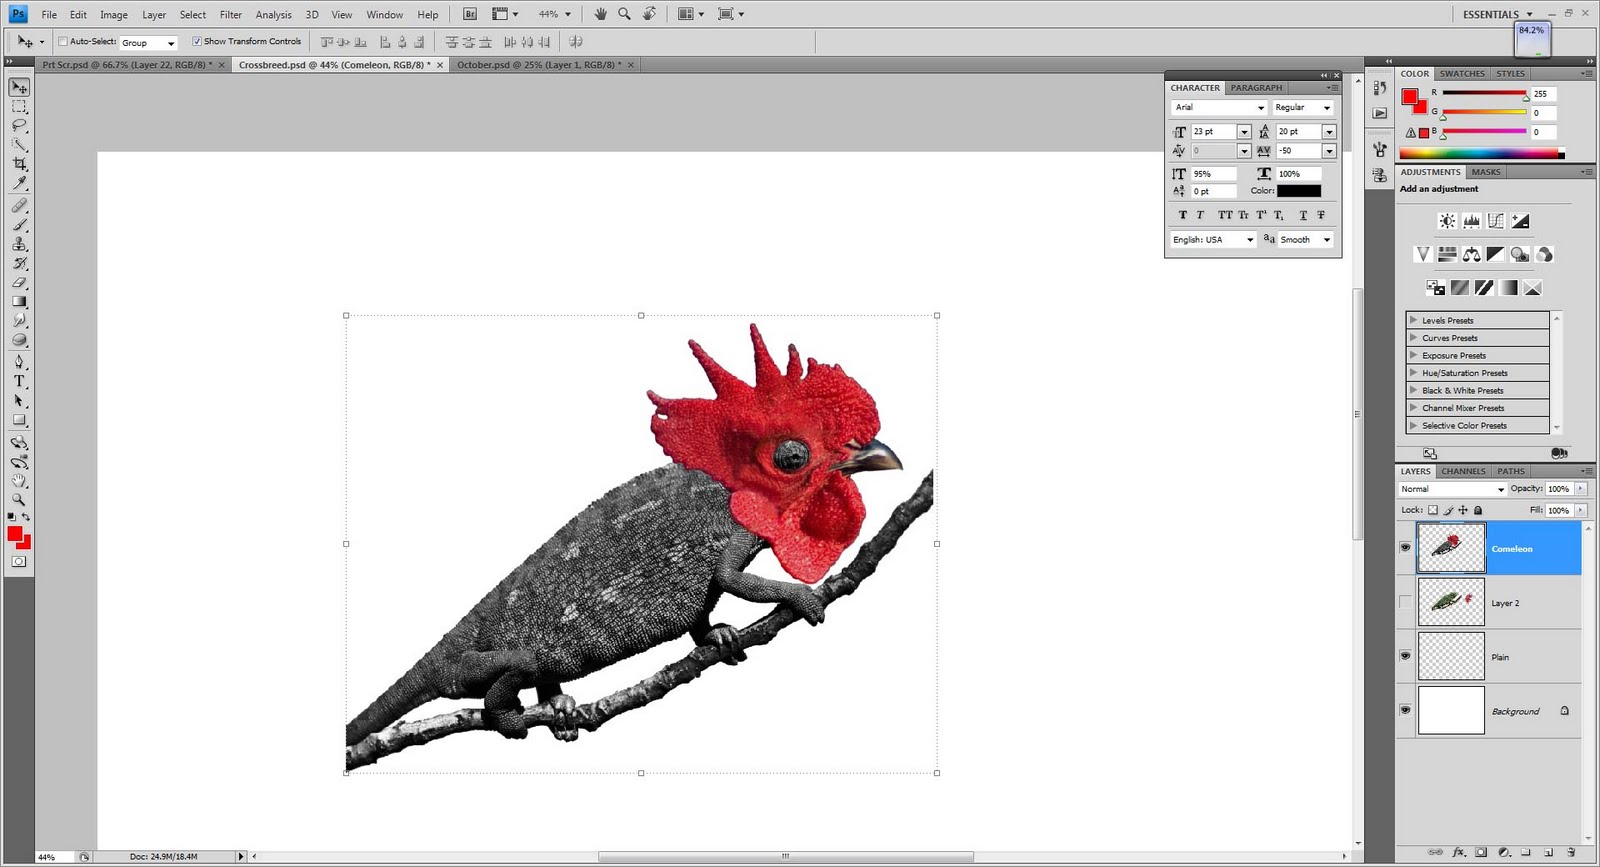
STEP 8 - Enable the visibility on other channels but disable the "Red Cropping" channel's visibility. Merge the chameleon and rooster layers and I added a new layer and named it "Plain".


STEP 9 - Go to "Select" and choose "Load Selection". Select "Red Cropping" and click OK. Then, I pressed Ctrl+J to copy the selected areas on a new layer and disable the visibility on the previous layer.


STEP 10 - Using "Lasso Tool" again, I selected the rooster's head and pasted it on a new layer so I can name the layers "Chameleon" and "Rooster".


STEP 11 - I mirrored the rooster's head and added a "Layer Mask" to crop the eye from the rooster and I applied it when finished. Then I dragged it to the chameleon's head and adjusted it until it matches. I also used "Clone Stamp Tool" to touch up.


STEP 12 - I made the chameleon's body Black and White by using the "Hue/Saturation" option. After this I merged the "Chameleon" and "Rooster" layers and named it "Comeleon"(Co for cock).


STEP 13 - I open a new tab named "October" which was previously done similar to the "September" templates and pasted the "Comeleon" and did some adjustments.


The End...